This article originally appeared on ScooterDad.com and has been reposted here for posterity.
Stopping the rattle on a District V2’s brake is easier than you think!
One of my scooter kid’s competition scooters has a District V2 deck and, as much as he loves it, it has always bother me how much the brake rattles. He usually complains about his scooter not being “dialed”, but for some reason he has overlooked it on this deck, although I think it has secretly bothered him. Despite the rattling brake, the District V2 deck is a great deck for younger kids who can benefit from a lighter deck with a wide, flat grinding/stalling surface.
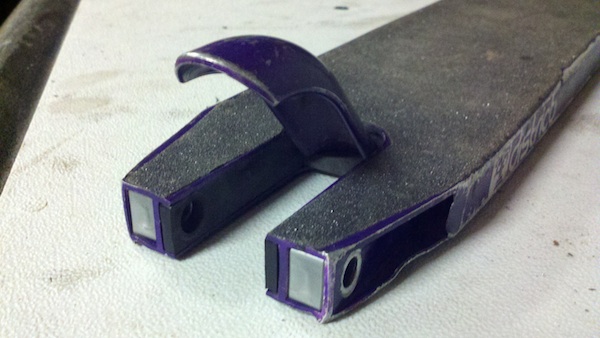
It’s actually somewhat surprising how much the District’s brake rattles considering the way it is designed. They have eliminated the spring (YAY!) by using a plastic/rubber carrier mechanism which acts as a mount and the flex resistance. I especially like how the carrier uses the axle to mount the brake and how the wheel spacers are integrated into this design. Unfortunately, the brake just doesn’t fit tight enough to prevent it from rattling. Hopefully they will be able to remedy this flaw in future versions. Phantom Scooters actually makes a flex fender-style brake for the District deck, but I haven’t tried it yet.
So last night, I was sitting on the couch watching TV and Paxton, my scooter kid, was sitting near me watching YouTube videos on a laptop. I usually don’t have much interest in the kinds of videos he likes to watch on YouTube, but I snapped to attention when I heard the guy on a recording say that he was going to explain how to dial the brake on a District deck.
“Dialing” a brake or some other part (or the scooter as a whole) means that the rattles have been removed from a scooter so that when you drop it on the wheels and catch it on the bounce, it rings like a bell. This is referred to as a “drop test”. There is a certain social status associated with having a fully dialed scooter, so don’t be surprised if your kid makes a big deal about this. Depending on your scooter’s parts, this can sometimes be difficult to achieve.
As we watched the video, Paxton kept looking over at me as if he didn’t believe that I was watching the video, which is fair since I’m usually telling him to turn down Annoying Orange. ;)
In the video (see below), the narrator explains how he used a piece of bicycle tubing to take up the slack in the brake carrier. It’s a really simple method that works surprisingly well to dial the brake, so tonight I gave it a shot on one of Paxton’s District V2 decks (yes, he has 2 after he won one at CooterCon11). I used a heavy duty motorcycle tube that I had laying around (finally my garage junk hoarding pays off!), which was a little more difficult because of the thickness. If you’re using a thicker tube like I did, I recommend cutting it so that you cut the tube just long enough to wrap just around the bottom and the end of the brake, but not the top otherwise it will be too thick to fit the carrier back into the deck.
This method to dial the District V2’s brake is simple, easy to do, and really makes a difference in the sound and feel of your kid’s scooter. Free and easy mods are the best kind. Give it a shot and see how it works for you!